Driftless cardigan v.1

20171122_140028

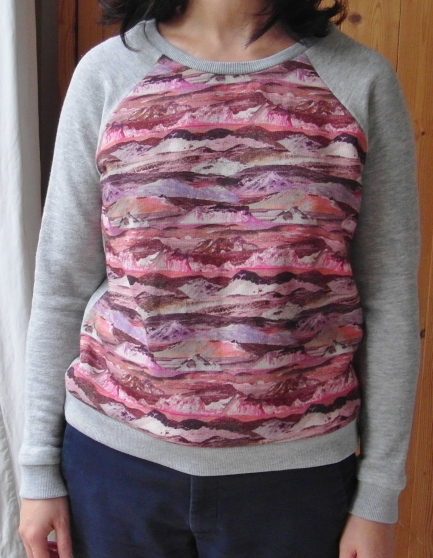
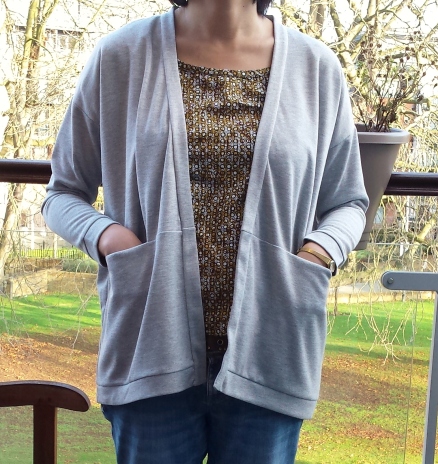
If there’s one item in my wardrobe that I couldn’t be without, it’s cardigans. I own, er, over 20 of them. So I’ve been keen to make the Driftless cardigan pattern from Grainline Studio ever since it came out. However, sourcing the right type of knit proved difficult as most shops stock jersey that is more suited to t-shirts and tops. I really wanted some merino wool jersey but not on my budget.

20171122_140119

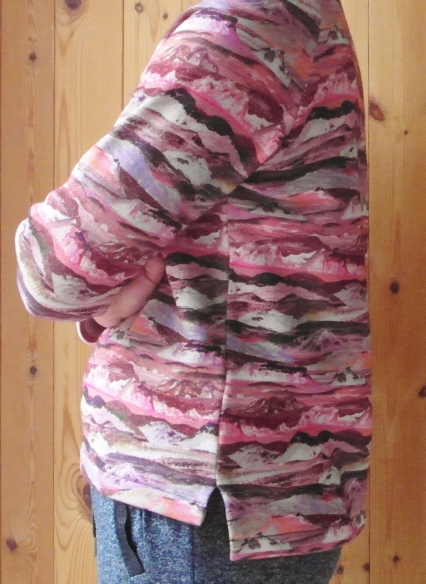
I eventually found this polyester knit from Mr Fabric in Lewisham which has sadly shut down. It was in a box of random scraps and was a bargain at £6 for 2 meters. The fabric has a lot of drape and is off-white on the reverse. It didn’t have the right amount of stretch for the pattern but I thought I’d wing it as the style is oversized.

20171122_140059

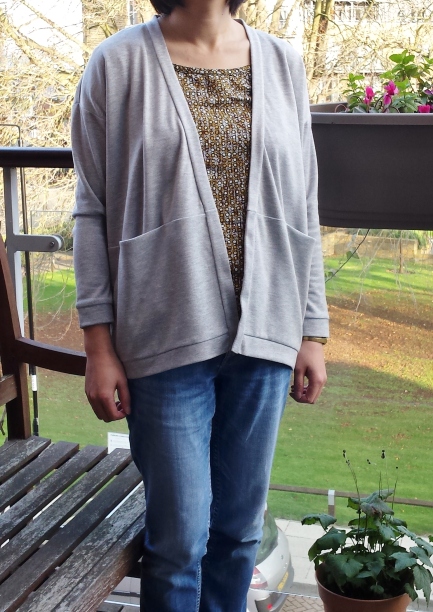
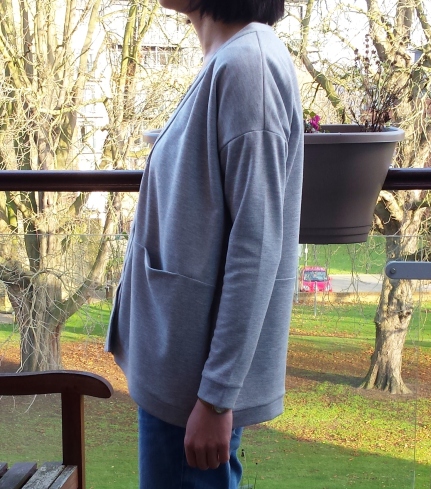
I cut out a size 8 and took 1.5″ from bodice pieces and 1″ from the sleeves. I had read that the sleeves are on the tight side but such was my eagerness to sew something at long last that I ignored this. So naturally the sleeves did turn out a little snug and could do with being graded up a size. If my fabric had more stretch, I think I would’ve got away with it.

20171122_140024

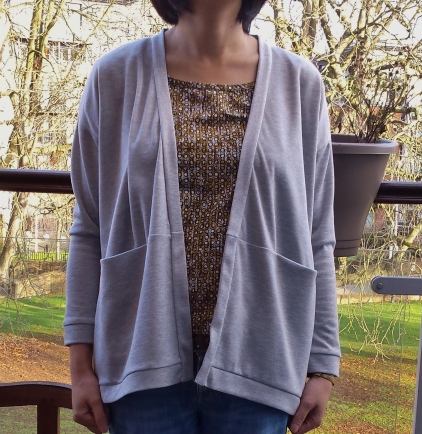
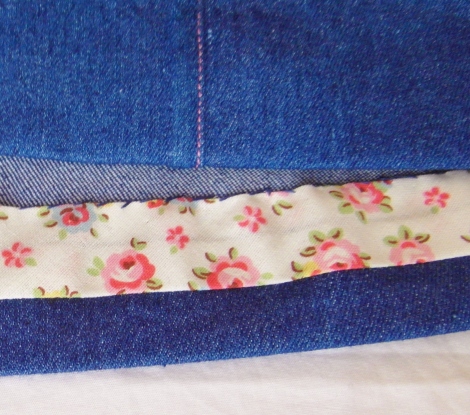
The finish is also very neat with bands finishing the cuffs, hem and neckline. Oh yes, the neckline. This pattern should come with a warning that the neckline requires copious amounts of hand stitching. I read one blogger did it in 20 mins but it took me 1.5 hours and I don’t think I’m especially slow.

Despite this minor point, I love everything about this cardi especially the deep pockets and shaping. Plus the light grey will co-ordinate well with other separates. I’ll be making more versions of this and it would make a fab jacket if made in a slightly heavier fabric.

P.S. Eagle eyed viewers may notice a new backdrop. I’ve moved house, hence the months of radio silence. So it’s goodbye horrible orange pine wardrobe and hello balcony!

Posted in handmade, sewing | Tagged | 3 Comments

Sew now magazine pinafore dress

I wasn’t planning on making a pinafore dress until I discovered this free downloadable pattern from Sew Now Mag. I figured the pattern looked simple enough and decided to wing it and make it without the instructions.

I cut a size 14 and included centre back seams for the front and back pieces. This was as much due to a lack of fabric as a conscious style decision. I used pink thread to make a feature of the flat felled centre seams. The seams are slightly off centre as I didn’t realise a flat felled seam would knock it off kilter but it’s not too noticeable.

I took 1cm off at the side seams as it came up quite loose. I should’ve gone with a 12 but with no size guide to work from, I wanted to leave some wiggle room. The pattern included a side zip but I allowed enough ease at the hip to not have to insert one. I also shortened the bib as it looked quite high in the photo and I wanted it to sit below the neckline of any top I was wearing.

I didn’t like the crescent shaped patch pockets so left them out and drafted a bib pocket instead. To reduce bulk I used gingham for the facings which contrasts nicely with my denim. I also used some cute Cath Kidston bias binding at the hem as I didn’t want to do a doubled turned hem with my thick denim.

Whilst this dress was quick to sew it took a while to finish as I couldn’t find the right buckles. I finally found some antique brass ones on Ebay. The straps are 30 mm wide and most sets in the shops are 40 mm and silver. Despite my apprehension, attaching them was really easy. I made sure to mark my button placement point before going in with the hammer. My buckle set didn’t include a slider so I sewed down the straps to fix them in place.

I’ve come round to pinafore dresses, this dress is so comfortable and has been worn most weekends . The royal blue denim goes well with my collection of stripy tees. I’m wearing my mustard Tonic tee in the photos. Not bad for a free pdf download made from leftover fabric in my stash.

Posted in sewing, Uncategorized | Tagged | 11 Comments

Toaster sweater 2 in stripes

My grey toaster sweater has been in constant rotation since I made it and I wanted to make another straightaway. I found the perfect fabric for my second version rummaging through a box of pre-cut samples from Mr Fabric in Lewisham. I bought two other pieces of fabric from the same shop and they also came from this box of treasures.

Most of the fabrics had fibre content labels so I guess they were fashion industry samples. The fibre label confirmed my suspicions that it was completely synthetic. It’s made of nylon, polyester and elastane, so highly flammable then! It melted whilst I was pressing it but fortunately the damage was only slight. The fabric is actually navy and white but looks black in photos. It also has a lovely textured finish.

I cut a small for this iteration as my last one was a bit roomy. I also lengthened the bodice by 3 cm and took 7 cm off the sleeves at the lengthen/shorten line. Last time I shortened the sleeve at the cuff so it didn’t taper at the wrist. I also sewed down the vent by an extra 3.5 cm which makes the back hang closer to the body. I applied Pellon Knit-n-Stable tape to all the edges that I planned to overlock as I was wary of my fabric getting chewed up by the overlocker. This stuff is amazing and my fabric did not get sucked into the dog teeth.

I absolutely love the fit of this sweater and it’s great for Spring. I tend to give synthetic fabrics a wide berth but can report I’m not overheating in it. I prefer the closer fit of this version and the length is just right. Sewing down the vent by a few centimetres has made all the difference and it doesn’t gape as much. I’m so pleased to have discovered another TNT pattern. I might hack the neckline and make it a boat neck version next time. The hunt continues for more sweater knits.

Posted in handmade, sewing, Uncategorized | Tagged | 4 Comments

Simplicity 1366 by Cynthia Rowley

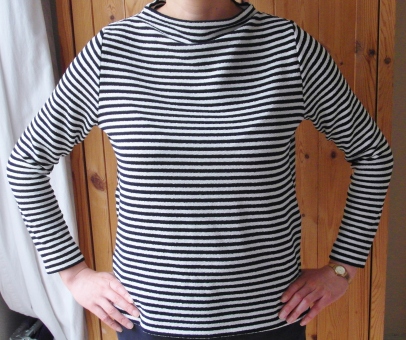
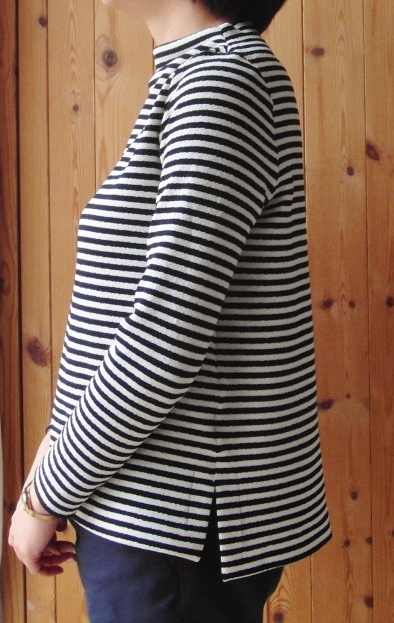
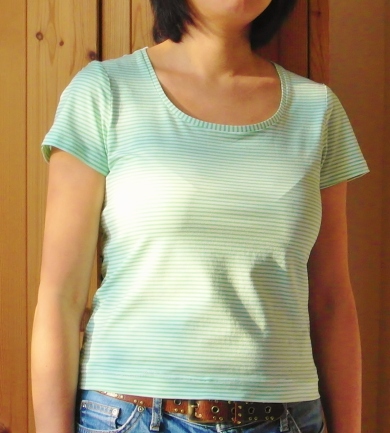
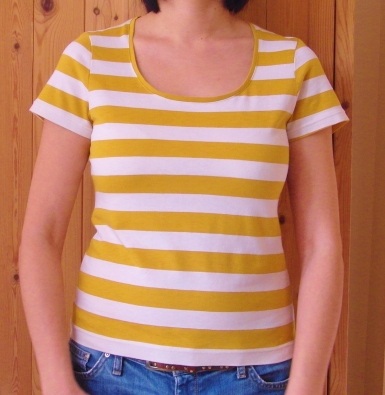
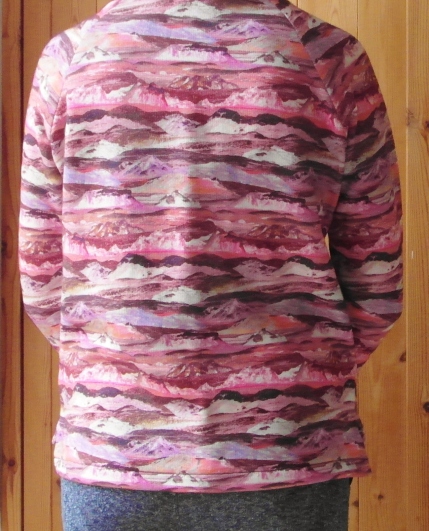
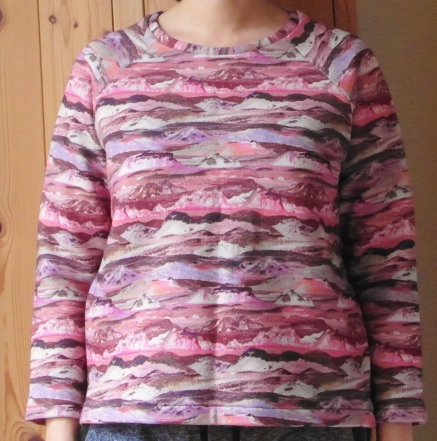
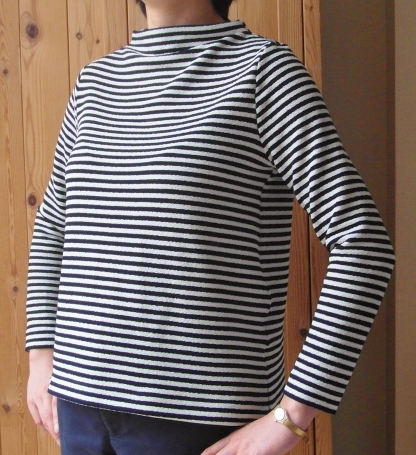
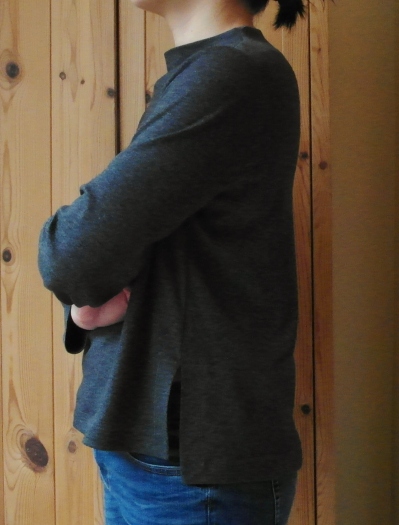
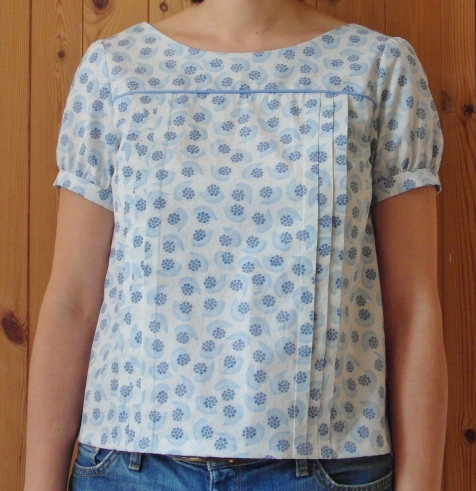
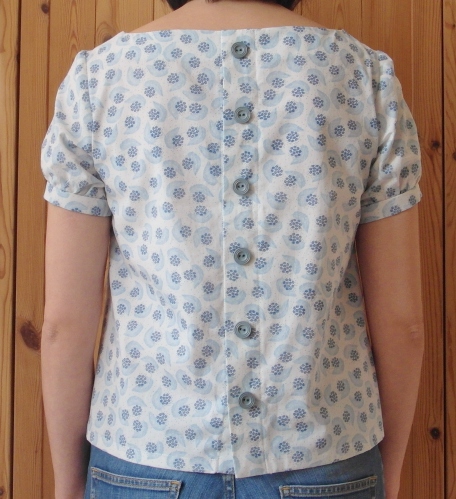
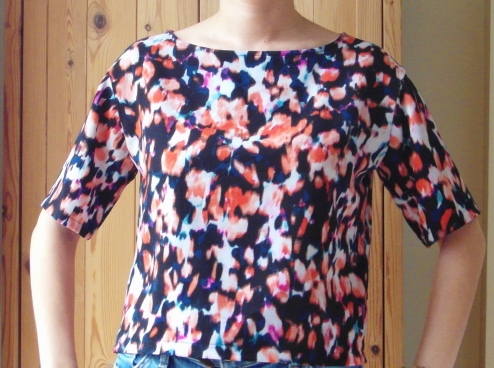
I had high expectations for this popular Cynthia Rowley pattern and it’s been on my to-sew list for ages. It’s a simple loose fitting woven top that’s easy to fit and quick to sew. There are no darts and the wide neckline means no closures either. I love the dropped shoulders and boat neckline.

I cut a side 12 but found it a little too loose for my tastes so I used a 2cm seam allowance on the side seams and sleeves. It’s still too roomy so I’ll sew a size 10 next time round. I didn’t follow the instructions to sew the sleeves in flat as I was on auto pilot and did the usual easing in method. I’ll try the flat construction method next time as this looks much faster. I’ve not seen this method used on wovens, but I guess the looser fit allows for this.

The only tricky bit was sewing in the binding of the neckline. It’s very narrow so I’ll use a 0.5 cm seam allowance next time which will make the binding wider. I also found the sleeves way too long so I took 3 cms off.  I folded the sleeve hem up by 3 cms to shorten them further. I’m still not sure about them as I think they look a bit too wide for the length of the top.  Next time I will lengthen the top by about 2-3 inches as I think this would look better with elbow length sleeves. 

Some of you might recognise the crepe from my GBSB shift dress. I love the print and was fortunate to have enough left over for a top. This was not quite the TNT pattern I was hoping for but I’m nearly there. 

Posted in handmade, sewing, Uncategorized | Tagged , , | 8 Comments

Toaster sweater 2

sam_7526

There’s nothing like compiling a #2017makenine list to kick start your sewing mojo. I’ve made two from my list already! I fell for the Toaster sweater 2 as soon as it was released and from what I’ve seen on Instagram, so have many other sewists. The high-low hem, funnel neck and side vent details are so contemporary and chic.

sam_7518
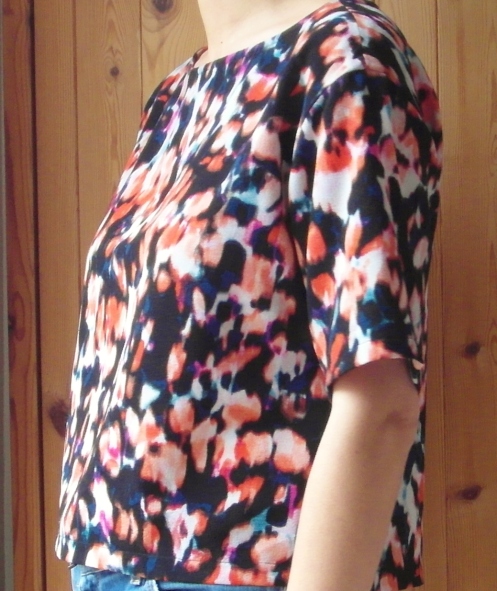
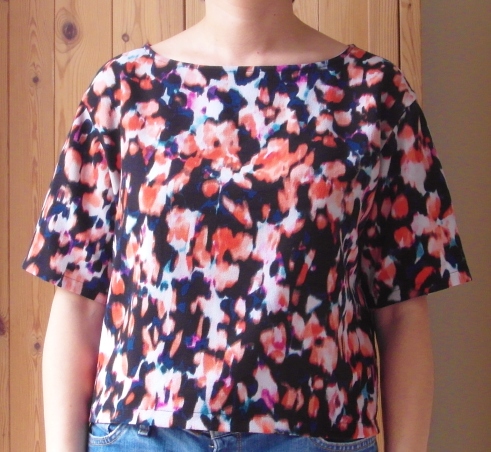
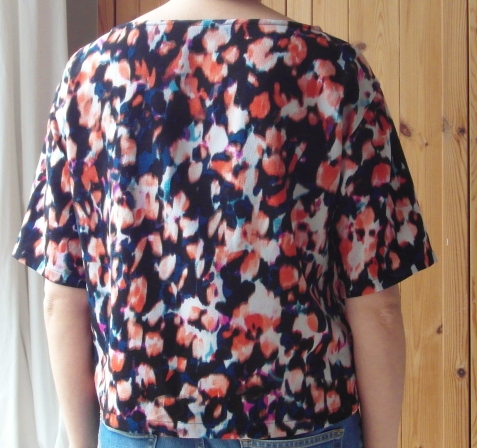
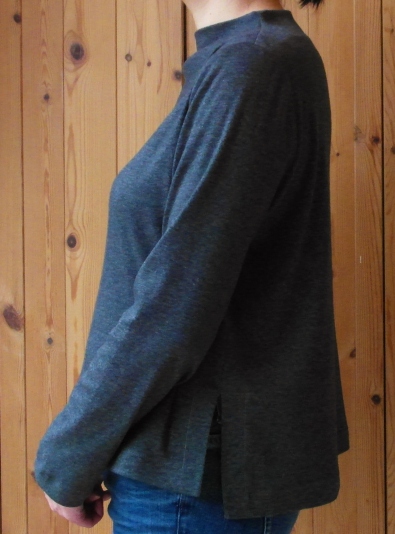
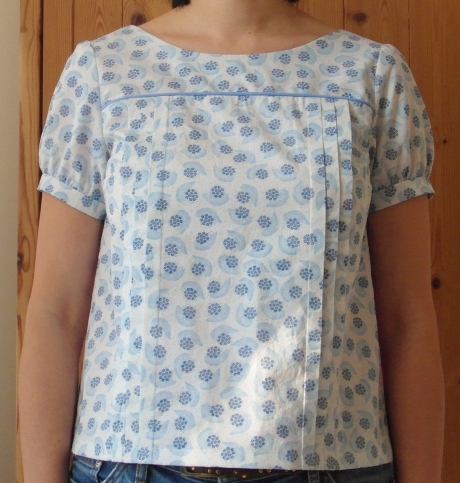
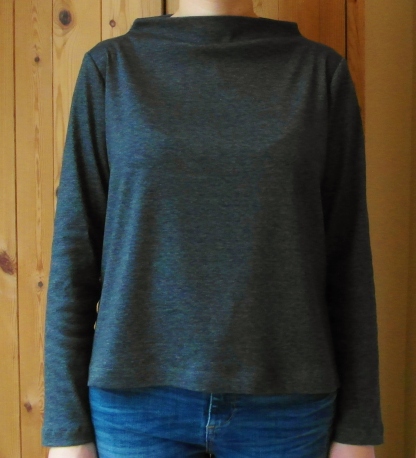
The hardest thing was finding the right kind of fabric. Sweater knits are hard to come by in the UK and I’m averse to knits with a high poly content as they never wash well. Fortunately I stumbled across this cotton jersey in the John Lewis sale. It has a tight knit and the wrong side looks and feels like brushed cotton. I wish I’d bought more as it would have been perfect for a Driftless cardigan, also on my #makenine list.
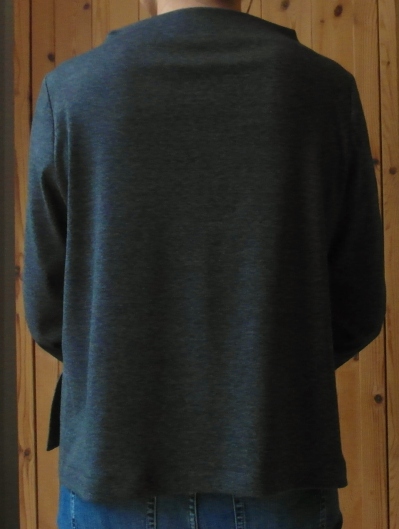
sam_7522

Sewing up was a doddle. The instructions are really clear and the way in which the hem is finished with a mitred corner is genious and makes for a professional looking finish. I used a zig zag stitch to finish the hems as my twin needle stitching kept skipping stitches.

sam_7521

I sewed right side up as I prefer how the stitching looks this way. To guide my stitching, I chalked my stitch lines at the vents and tacked where I needed to pivot my needle.  Before I did this, I overlocked the vents and hem. My overlocker did not like my stretchy fabric so I used a narrow strip of interfacing to give it a bit of stability. I hand sewed the neck line facing rather than stitching in the ditch as there would be less room for error doing it this way.

The only change I made was to shorten the sleeves by 2 inches as they extended way beyond my wrists. I made no changes to the bodice for once as the length looked fine to me. The side vent is cut very high and makes the back swing out so I’ll probably wear this with a camisole. Next time I’ll either lengthen the top slightly or shorten the vent so that the back sits closer to the body.

sam_7530

I rarely sew solids and I’m loving the charcoal grey. It’ll go with most of my work wardrobe and I can see this being in heavy rotation. I’m definitely going to make more of these sweaters if I can source the right fabric. Last year I went crazy sewing lots of Linden sweatshirts. This year I think it’ll be Toaster sweaters.


Posted in handmade, sewing, Uncategorized | Tagged | 6 Comments

Mathilde blouse

sam_7512The Mathilde blouse is one of my favourite patterns from Tilly and the Buttons. I just love the tucks and way it fastens at the back with a cute row of buttons. And you can also make a feature of the yoke by adding some piping. Who doesn’t love a bit of piping!

I began making this last spring and finished only last week. Whilst I enjoyed sewing this pattern, progress was very stop start. It’s not a quick sew as there are a lot of steps and I had to tweak the pattern due to a lack of fabric. I was also so wary of sewing the tucks that I procrastinated for a few months and allowed myself to get waylaid by other projects.

sam_7513

I used a treasured cotton poplin from Fabrics Galore and managed to squeeze my blouse out of one metre of fabric, hence the short sleeves. I found the cuffs a little tight probably because they are supposed to sit lower down the arm and not the bicep. If I was making another short sleeved version, I’d make the cuff wider. I had planned to sew slimmed down sleeves as per this earlier iteration but ran out of fabric. However, the fabric is quite crisp, so it’s probably just as well.

Apart from shortening the sleeves, I also lowered the front neckline slightly as it sat a bit high for my tastes. I altered the facing to match and did my usual short bodice adjustment. Sewing up was pretty straightforward. The tucks weren’t as tricky as I feared and the instruction booklet is really clear. I just had to re-do one of the tucks as the perfectionist in me wanted them to be absolutely uniform and parallel.

sam_7510

I didn’t bother with sewing buttonholes as the neck is wide enough for me to get my head through. I’m so chuffed I was able to use these vintage teal buttons from my stash. I have a very large button collection but never sew anything needing buttons! For my next iteration, I’ll deepen the yoke slightly and start with the right amount of fabric.

sam_7515

I think this is the cutest blouse and it’s my current favourite make. I can’t wait for the weather to warm up so I can wear it. It’s a shame to cover those buttons under lots of layers. Roll on spring.

Posted in handmade, sewing, Uncategorized | Tagged , | 6 Comments

The perfect tee

sam_7499
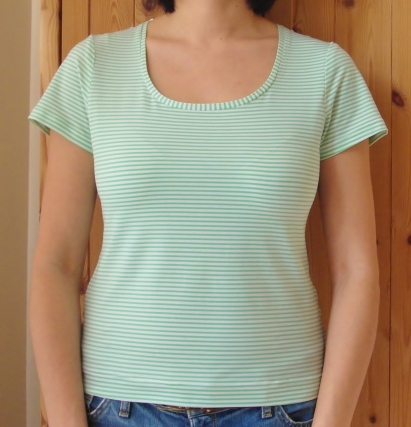
The tonic tee from SBCC is my first finished make from my #makenine list and it’s my new TNT t-shirt pattern. I was after a classic fitted tee and this free downloadable pattern is THE ONE. The bodice has the right amount of ease, it’s finished with turned up hems and the neckline hits at the right spot. I find the scoop of the Plantain tee too low and the neckline of the Renfrew a bit high. I sewed a size M and just had to shorten the bodice by 2 cms.

sam_7494

For my first iteration I used a green stripe knit from the Cloth House. This had a high elastane content and was super stretchy. The cut edges had a tendency to curl, even after pressing. I used a lightning stitch to sew the seams and then finished the seam allowances using my overlocker. The neckband is sewn flat with one shoulder seam open which was a new to me technique. I found the neckband too long and the diagram implies you need to chop off the excess. There weren’t many markings on the neckband so it was difficult to know how to distribute the fabric evenly around neckline. The finished neckband sits fine at the front but gapes at the back so it could have done with more tension in this section. There were no instructions to stabilize the shoulder seams but I did this anyway with a bit of stay tape.

sam_7500

I used a twin needle to finish the hems and put woolly nylon in the bobbin. I’d heard good things about this stuff and I can report that it works. Being a bit stretchy it has the necessary give to stop the ridge effect you often get when using a twin needle. I’ll be using this stuff a lot more in future. I used wonder tape to keep my hem in place when sewing it up. This worked much better than pins on my curly fabric.

For my second iteration, I used a gorgeous mustard stripe jersey bought in Marseille. It was super cheap, 3 euros for 1 metre. This time I sewed the neckband after finishing both shoulder seams. I measured the neckline and took about 1.5”off the length of the neck band. I quartered both the neckband and neckline and used these markers when sewing in the neckband. This worked much better than the previous method and the neckband sits nice and flat.

sam_7502

To achieve a super neat finish I stuck the hem down with hemming tape before using my twin needle and woolly nylon. I think this gives more stability to the jersey and prevents channelling. I’m so pleased with the fit and finish of this tee. All the stripes match at the side seams and the sleeves look symmetrical. One of my goals was to perfect how I finish knits and I’ve nailed it with this tee. I don’t think I’ll be buying RTW tees anytime soon.

Posted in handmade, sewing, Uncategorized | Tagged , | 9 Comments

#2017makenine

After much deliberation my #2017makenine @rochelle_new #ilovesewing #handmadewardrobe #sewcialists Top row: Built by Wendy top/Burda 110b trousers 4-2014/Vintage button front midi skirt Middle row: Isley skirt/Tonic tee/Alder dress Bottom row: Toaster sweater 2/Driftless cardigan/Inari dress

Last year I joined in with Rochelle’s brilliant idea to post nine things on Instagram that I wanted to make in the coming year. When I say joined in, I only completed three makes. So when it came up again, I thought I’d give it another go. Hopefully I’ll make more of a dent to my #2017makenine list.

After much deliberation, I came up with my list. The selection ranges from seasonal knits to wardrobe gaps, e.g. summer skirts. I’ve also challenged myself by throwing in a pair of trousers. So here’s my nine:

Toaster sweater 2Toaster Sweater #2 PDF pattern

When this pattern came out, I instantly hit the buy button. I could make my own jumpers without having to take up knitting! I love the contemporary design and the finished makes on Instagram look awesome.

Driftless cardigan

Driftless Cardigan PDF

I live in cardigans. If I’m not wearing a Linden sweatshirt, then I’m in a cardigan.

Inari shift dress

This was on the list last year but didn’t make the cut. I must be one of the last sewists to make this pattern.

Alder shirt dressImage result for alder shirtdress

A repeat from last year. Hoping to master collars with this one.

Isley skirt

Source: Marilla Walker patterns

I need more casual skirts. This elasticated skirt looks simple, stylish and a quick sew.

Midi skirt

Image result for button front midi skirt

Source Madewell.com


I plan to make this skirt using a vintage pattern (green skirt – top right). It looks so good in chambray.

Burda trousers #110 4/2014

Image result for Burda trousers #110 4/2014

Another repeat that didn’t get off the ground. I did make a toile but it needed so much work. So I ran away. Maybe I’ll get a better fit this time round.

SBCC tonic tee

Tonic Tee

Most of my tees are RTW. I don’t like them much as they aren’t great quality and are way too long. Not everyone wants tees over their hips. I’d like to sew a classic tee and this pattern looks promising. I also want to up my game on how I finish knits as I tend to get a ridge when I use a twin needle. I’ve now got a walking foot and plan to use wooly nylon.

Built by Wendy top – Simplicity 3964

Image result for built by wendy tunic top pattern

I fell hard for Morgan’s versions of this pattern and managed to find this out of print pattern on Ebay. It’s got many interesting features and would look great in a check or a solid.

With the exception of the Driftless cardigan, I have fabric in my stash for all these patterns. I have so many lovely fabrics waiting to be sewn up and need to stop adding to my stash. I’m hoping this list will help focus my sewing and stop me from buying fabric with no project in mind. We’ll see how I get on!


Posted in Uncategorized | Leave a comment

Liberty Linden in Manning fleece

sam_7483

This is my sixth Linden sweatshirt. It’s also my favourite Linden and is made from an extremely cosy Liberty fleece that I bought from Goldhawk Road. If you’ve seen fleece or loopback jersey in Liberty, you’ll know it’s pricey stuff so I couldn’t walk by when it was going for a mere £15 a metre. I bought 1.5 metres which was plenty for my Linden and the front bodice of a Linden I made for my sister.

SAM_7141

So can we talk about the print. It’s called Manning and looks abstract at first glance but it’s actually a digital print created from photographs of Icelandic glaciers and mountains. It’s really striking and I love the colours.

As I was using fleece, I left out the hem band and cuffs to reduce bulk. I also wanted a simple design in keeping with the modern print. I shortened the sleeve by 2 inches and used a 2cm hem which I overlocked and turned up.

sam_7488

I lengthened front and back bodice by 2 inches and then chopped off another 2cm from the front to create a high low hem. I made a side vent and hand sewed the side seam allowances for a clean finish. The hem is 1 inch which I turned up to reduce bulk. The sweatshirt was sewn with a zig zag stitch on all seams except on the neckband where I used a straight stitch. I went over my stitching again for strength.

sam_7489

I cut the neckband on crosswise grain so my fabric had more stretch. There was no give on the lengthwise grain. I guessed the fabric might not be stretchy enough so added 2cm to the length of the neckband. The neckband was quite a bit shorter than the neckline and I really had to stretch it to fit. Luckily it worked out but I’d add more length if using a similar fabric. I used a 0.5 seam allowance at neckband to get the width I wanted.

sam_7484

This has turned out pretty much how I wanted. I love it soo much I never want to take it off.


Posted in Liberty, sewing, Uncategorized | Tagged | 6 Comments

Reflections and goals for 2017

Last year was all about slow sewing and I finished twenty items, far fewer than 2015 when I was on a mission to blitz my UFOs. I didn’t take on a grand project as I wanted to sew simple and easy to fit patterns after making my first coat last year.

I sewed quite a few patterns back to back as I wanted to refine the next iteration whilst the last make was still fresh in my mind. There were lots of repeats: 5 Linden sweatshirts, 2 Bettine dresses, 2 Maritime tops and 2 Mathilde blouses. I can’t get enough of that Linden pattern and have just made another in a luscious Liberty fleece (to be blogged). The Bettine is another hit and it’s my favourite summer dress.

I’ve got better at sewing things I want to wear and have worn everything I’ve made this year several times. There was only one dud so good going there. So how did I do against my sewing goals?

  1. Sew a holiday wardrobe – I made a couple of tops for my holiday to Seville so that’s a tick.
  2. Sew skirts – I only managed to finished a Chardon skirt. Not sure why I hit a wall with skirts as they aren’t hard to sew.
  3. Sew casual dresses – Tick! But I didn’t get round to making an Inari or Alder. My wardrobe is crying out for these dresses!
  4. Sew more solids – I made only three items. Prints win hands down.
  5. Sew from stash – Most of my makes were sewn from my stash. Great. But I also bought over 30 pieces of fabric last year. Not great. So I’m allowing myself to buy fabric for toiling or solids next year. I’m also thinking of have a Kondo-style cull as some pieces go way back and my tastes have changed.

I’m going to repeat three goals, namely two, four and five, so my additional goals for 2017 are:

Sew a perfect tee

I want to improve how I sew knits. I’ve discovered a lightning stitch gives a better finish on knits and that going over a zig zag with a straight stitch stops the ladder effect on the right side. I’ve just bought some wooly nylon and want to give this a go with a twin needle. Combined with this goal is to hack existing patterns to produce my perfect tee. My plan is to experiment with the Renfrew, Plantain and Tonic tees.

Revisiting old patterns

Rather than sewing the latest pattern release or jumping to the next new project, I want to revisit some old patterns. These include the SOI Ultimate trousers to perfect the fit, Simplicity 2451, as this is a fab skirt pattern and the Mimi blouse, as my current viscose version is coming away at seams due to over zealous grading.

Keep a sewing diary

I’m going to keep a notebook by my sewing machine to record changes I’ve made and to note things I’d do differently next time. This will help to refresh my memory when I have a break in the making process and stop me repeating mistakes.

I like making sewing goals as it helps to keep me focused. I’d be sewing lots of dresses I’d never wear otherwise. I’m still working on my #2017makenine shortlist as naturally I want to sew ALL the patterns. I only finished three on my list last year but it’s good to have goals. My #2017makenine will be aspirational rather than a must sew list. Happy sewing everyone.


Posted in sewing, Uncategorized | 2 Comments